Refer to the "Submission Detail Overview" for additional information.
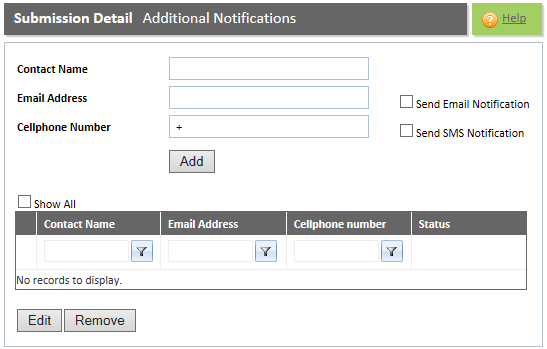
The 'Additional Notifications tab' is used to create additional notifications to be sent to various parties at the time of successful dissemination.
The submitter of the announcement will, by default, receive an email. The submitter can decide to send both an SMS and Email to the recipient. Clients are informed that the announcement has been disseminated. The JSE clients can then log on to the FTP location and view the announcement. Public users will use the "extranet" option on the JSE's website to view the announcements.
The delay time between a client receiving a notification of the announcement, and the public being able to view the announcement on the JSE website, is set up by the IRS Administrator.
Step |
Procedure |
1 |
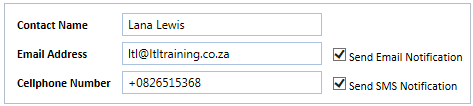
Enter the relevant information required, that is, the Contact Name, Email Address, and Cellphone Number. Select either the Send Email Notification check-box or the Send SMS Notification check-box.
Note: Refer to the section "Fields in the Additional Notifications tab" for the type of information to enter in each field. |
2 |
Click the ADD button. Note:
|
3 |
You can add as many contacts as required. Complete Steps 1 - 2. |
Step |
Procedure |
1 |
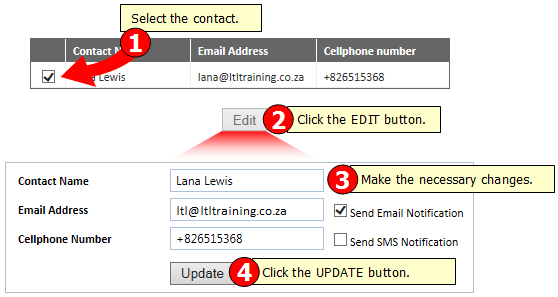
Select the contact whose details you wish to edit. |
2 |
Click the EDIT button. Note: The details will be displayed. |
3 |
Make the necessary changes required. Note: Refer to the section "Fields in the Additional Notifications tab" for the type of information to enter. |
4 |
Click the UPDATE button. Note: The changes will be saved and displayed in the Grid. |
 |
Quick Guide - Procedure to edit the details of the contact |
Step |
Procedure |
1 |
Select the contact that you wish to delete. |
2 |
Click the REMOVE button. Note: The following message will be displayed: "Are you sure you want to delete the selected record?" |
3 |
Click the OK button. Note: Click the CANCEL button to cancel this operation. |
![]()